Series Land Rover
(U.S.A./Canada)
|
|
|
Select
your Series
Land Rover Series 3 Problem you can't solve? Check the Tech Articles Try Series i quiz only Try Series ii quiz only Try Series iii quiz only 4x4 offroad quiz Choose how many multiple choice questions you attempt. Rank your score with other participants. Fascinating facts (No.82 ) The Series III 109in Hi-Cap was introduced in 1982 and replaced in 1983 by the 110 Hi-Cap Last Updated 5/12/09 |
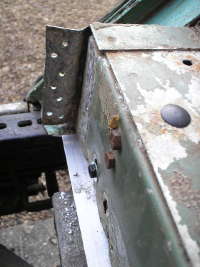
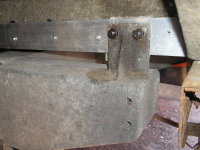
Series Land Rover Floor RepairThe body of a Series Land Rover is made from an aluminium alloy, which is very resistant to corrosion once it has built up a thin oxidised protective layer. However, we often see extensive corrosion of the bodywork at points where the aluminium is in direct contact with the steel of the chassis. One such area where this occurs in both SWB and LWB Series Land Rovers is at the rear chassis cross member supports for the body. However, the focus of this homepage is on the two supports which hold up the central floor section of the Series Land Rover stationwagons. This section is easily observed just infront of the rear wheels.
|